Some times we may have to set customer account and contact lookups using the customer field retrieved from a previous step. In most cases, I have seen people using a condition action to handle this, but the condition action is not a best fit if you are using it inside a loop or if you have more steps after this action.
Actually, you just need to use an expression to set the account or contact lookup using the customer lookup retrieved.

Consider you are fetching all invoices under an opportunity and you need to add a new invoice item detail for each invoice. We will be getting only the customer lookup value from invoice and we need to set account and contact lookups in the invoice item detail as shown below.
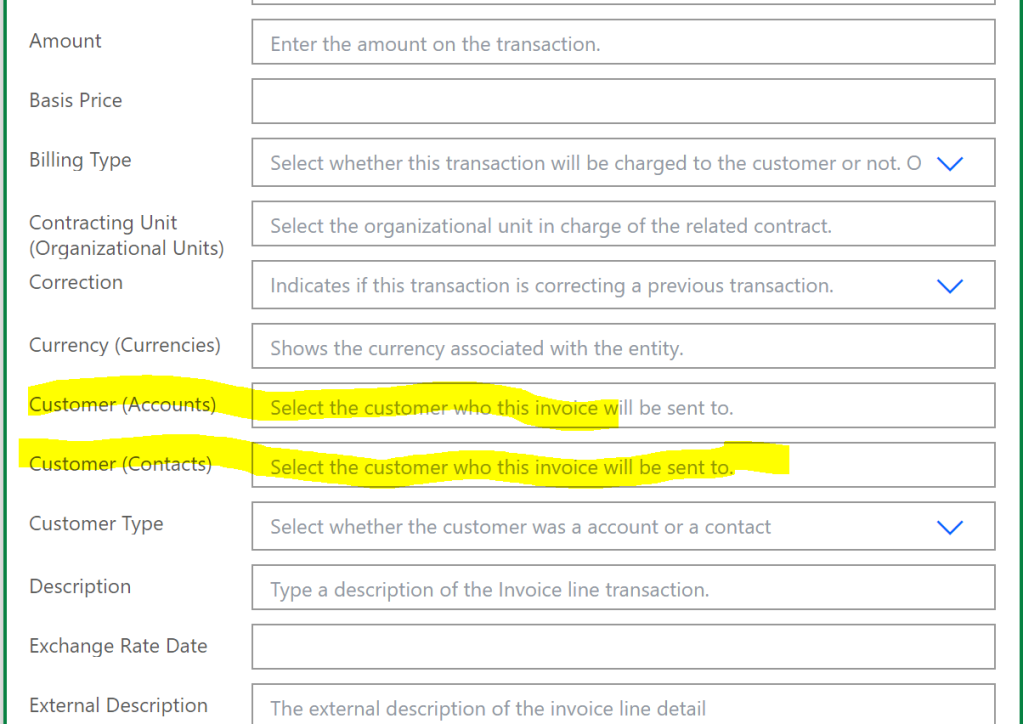
If you simply set the _customerid_value in both columns, the flow execution will fail because, the customer account lookup will be looking for an account with given GUID and customer contact will be looking for a contact with the given GUID.
To solve this issue, we can use an expression as shown in the first image. We can use the lookup logical name to identify the record type, so for the customer account lookup we can use the below expression. If the record type is not accounts we will set the lookup as null.
if(equals(items('Apply_to_each')?['_customerid_value@Microsoft.Dynamics.CRM.lookuplogicalname'],'accounts'),items('Apply_to_each')?['_customerid_value'],'')And for the customer contacts
if(equals(items('Apply_to_each')?['_customerid_value@Microsoft.Dynamics.CRM.lookuplogicalname'],'contacts'),items('Apply_to_each')?['_customerid_value'],'')

And we are done, hope this helps!!!