Some times we may have to set customer account and contact lookups using the customer field retrieved from a previous step. In most cases, I have seen people using a condition action to handle this, but the condition action is not a best fit if you are using it inside a loop or if you have more steps after this action.
Actually, you just need to use an expression to set the account or contact lookup using the customer lookup retrieved.
Consider you are fetching all invoices under an opportunity and you need to add a new invoice item detail for each invoice. We will be getting only the customer lookup value from invoice and we need to set account and contact lookups in the invoice item detail as shown below.
If you simply set the _customerid_value in both columns, the flow execution will fail because, the customer account lookup will be looking for an account with given GUID and customer contact will be looking for a contact with the given GUID.
To solve this issue, we can use an expression as shown in the first image. We can use the lookup logical name to identify the record type, so for the customer account lookup we can use the below expression. If the record type is not accounts we will set the lookup as null.
I was automating Teams private channel creation using Power Automate, and faced the below error when I tried to access the channel’s file location via graph API.
“Folder location for this channel is not ready yet, please try again later“
The Issue
Yes, the folder location is not automatically provisioned when a channel is created, because the SharePoint site will get created only when you hit Files tab from the UI after Channel creation.
This is by design.
WHY?????
Workaround
Executing the graph query /teams/{id}/channels/{id}/filesFolder on the private channel can mimic the files tab action from UI. However, it may not work on the first attempt, and will return a 404 response, you may have to try 3-5 times. So we need to use a catch for first attempt and then loop it until the the graph call succeeds. Please see the bow image for reference.
You can find the documentation for filesFolder request here. This issue exist for standard channels (Non-Private) as well. However, for standard channels, you only need to call the filesFolder request only once.
Sometimes we are asked to create console applications that interact with Dynamics CRM/ Dataverse, and like every new developer, we create a new project and look for a piece of code on the internet to start, or we copy existing code from an old project. I used this approach during all my projects, today I say stop, I want something more automatic and practical to start any new project of this kind.
Today I will share with you my experience on how to create a console app template project to connect dataverse and how to share the project template using a visual studio extension.
Let’s start with a demo. After following the steps in this blog, you will have the possibility to create a console app project that connects to Dataverse/Dynamics 365 CRM. The objective is to start implementing the business logic of the application without worrying about other aspects…
Recently, I received a strange requirement to show a dialogue to users as soon as they login to Dynamics 365. The dialogue can be an HTML page with company events or a video stream (exact requirement not mentioned here). The pop-up should be shown over dashboards as well as entity home grids. It is easy to show the dialogue on a record form as I can register JavaScript on the record form, or show an application-level notification using addGlobalNotification client API, if it was just a notification only. I was stuck on showing the dialogue on dashboards, as most model driven apps in D365 will land on some dashboard when the user logs-in, and we do not have any event triggers there. I shared the requirement with the community experts and finally Linn Zaw Win, Microsoft Business Application MVP, gave me a lead to try using the application ribbon buttons. Booom!!! It worked.
Added a hidden button in Global Tab (where the Advanced Find button is located) using Ribbon Workbench.
Added JavaScript function using CustomRule of the button Enable Rule.
Triggered dialogue by adding required logic inside my enable rule JavaScript.
Since the global tab is there on all screens of the model driven app (including dashboard and grids), the button enable rule JavaScript method will be called and so is our dialogue logic.
Add a new button in the global tab.
Create a new solution and add application ribbon and one entity (any entity is fine) to the solution. Now open your solution using ribbon workbench. Select ApplicationRibbon in the entity dropdown as shown below.
Add a new button in the Global Tab by scrolling the Home area to the right until you find the Mscrm.GlobalTab. Drag a button and drop into Mscrm.GlobalTab.
Add enable rule for the button.
In the EnableRule, add a new step as CustomRule and select the JavaScript web resource in the library and enter the function name. Set default value as False so that button will be hidden (assuming your JavaScript function is not returning “True” value), you can also use display rules to keep the button always hidden.
Create a new Command and add the new enable rule we just created.
Now associate this command with the newly created button.
Publish your button
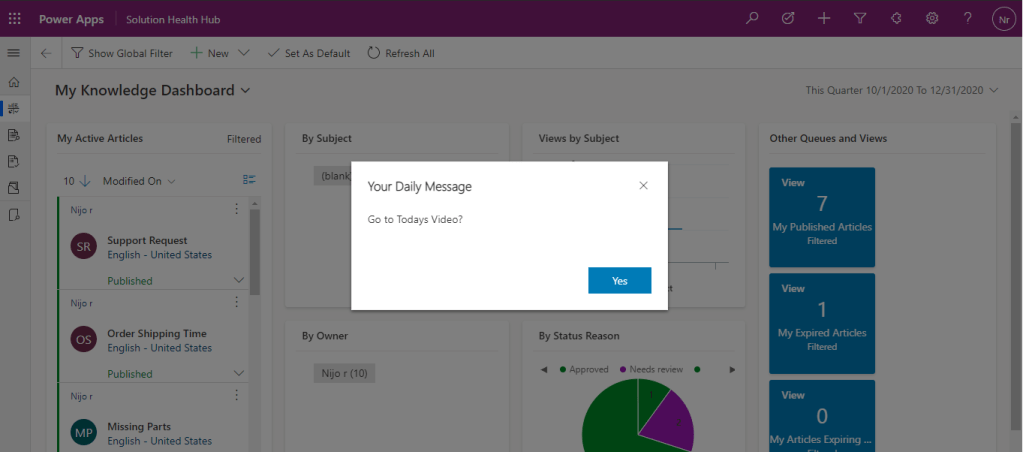
Once you have published, whenever a Dynamics 365 page is loaded, system will call your enable JavaScript. Below is the sample code I have used for showing a simple alert.
 function  showGlobalMessage()
	{
		 var alertStrings = { confirmButtonLabel: "Yes", text: "Go to Todays Video?", title: "Your Daily Message" };
var alertOptions = { height: 120, width: 260 };
Xrm.Navigation.openAlertDialog(alertStrings, alertOptions)
return false;
}
Note: As per the above logic, the dialogue shows (enable rule will be triggered) every time the user opens a new tab/window. To show the dialogue only once or with specific intervals, you can use a new custom entity to keep track of the notification setting for each user using Xrm.WebApi, or you can use localStorage (but using local storage may not be an officially supported D365 customization)
I know this is not a common scenario or ideal use case, but I hope it will save you some time when you come across strange requirements 🙂
Community plays an important role in everyday work life, at-least fifty percentage of my D365 and power-platform knowledge is gained from community(Blogs, Videos, Forums Etc..), that is why I love being part of awesome MS community.
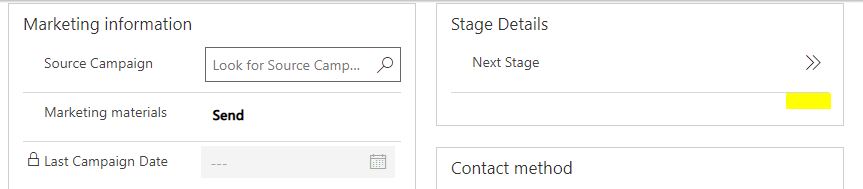
Recently one of my clients said he doesn’t want to use the next button in the business process flow but something similar in the form is required. I do not agree such requests but since they are not really using the business process flow, the request looked relevant. I had to show him a POC on the same day itself. This is were the community comes to help. I logged in to PCF Gallery and searched for something similar, within few seconds found this PCF mask with Fabric-UI Icons for two-option field by David Rivard.
Boom!! Cloned the git repo and POC is ready in an hour.
Added a client side script to change tab when the field value is toggled.
This is not a production ready control, its just a copy I made from a cloned Git repo.
One of my customer complained during a UAT session that, it’s too difficult for her to add new record using + button in a sub-grid, as it takes her to a new record window and she has to perform too many navigation. She was happy, when I enabled the quick create forms.
But, I was not happy and I wondered why OOB editable grid is not supporting this. I thought to give it a try using PCF controls, and this is the result.
Initially, it was not easy as we need to query the metadata to get field type for each column in the view. Following are the steps to configure smartgrid.
Primary Lookup: Logical name of the lookup field for the relationship. for example contact sub-grid in the account is “*parentcustomerid_account”.
Primary Entity Set: Entity set name of the current entity where the sub-grid is added
This is to set the related lookup using Web API, you can use Rest Builder to get these parameter values correctly, for example if contact sub-grid in account form is using parent customer relationship, to set the account lookup in contact following code is used var entity = {}; entity[“parentcustomerid_account@odata.bind“] = “/accounts(xxxxx-xxxx-xxxx)”;
Known bugs.
Does not support N:N
Validation for empty rows.
Does not support composite fields(customer lookup).
Poor CSS 🙂
Planned enhancements
Inline editing.
Validation for mandatory fields
This is not a perfect replacement for Quick create form, but you are always welcome to enhance and add features to Smart Grid Github Repo here.
So busy with year ending and 2020 plans. AsvI promised “The pro version will be released in two months”, I have to release the pro version today. Really sorry for the poor CSS, am actually bad at styling stuffs 😦 . But you can always improve the style and features in the Github, any updates are appreciated. Here is the github repo link.
Create a view with the required filters. If you do not require the control to consider certain activity types, you can exclude them in your view filter. The control will consider only the records returned by the view selected.
Add sub-grid to the form with the created view.
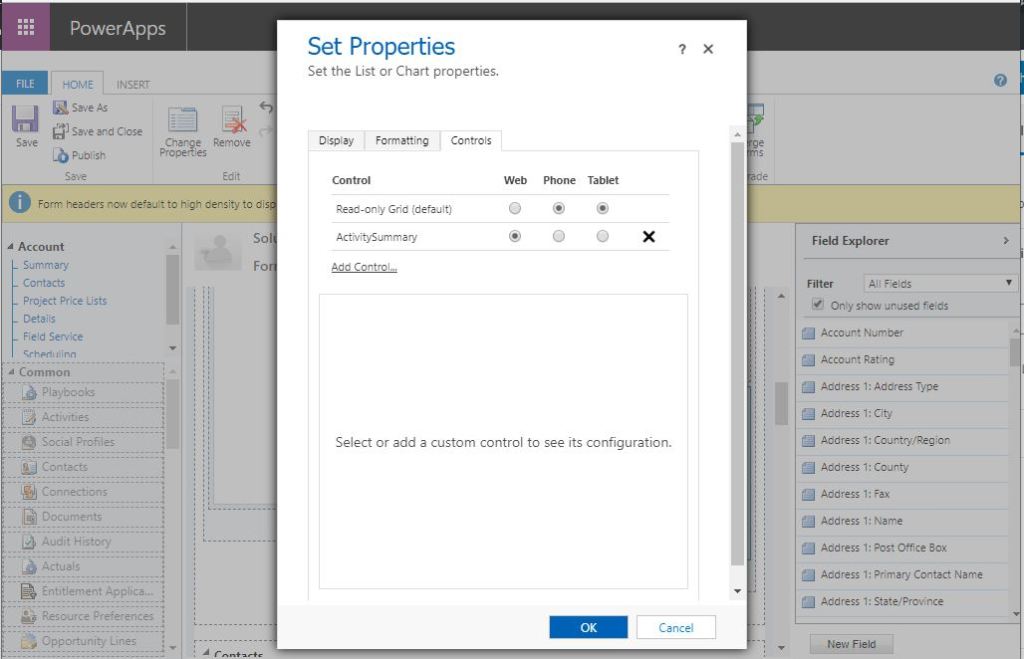
Add Activity Summary control to the sub-grid.
Note: If you need to exclude certain activity types, apply the same logic in the view filter.
It’s been a while since PCF controls were released for general availability. I was busy with my project schedules and finally, I managed to try out one. The Activity Summary grid. We can have activity timelines or sub-grids to view the activities under a record but these do not provide a high-level glance on activities. So I created one PCF to show activity summary, count of each type of activity under a record. This comes with Zero configuration. Whattt?? Yes, Zero configuration.
Create a view with the required filters. If you do not require the control to consider certain activity types, you can exclude them in your view filter. The control will consider only the records returned by the view selected.
Add sub-grid to the form with the view we created.
Add Activity Summary control to the sub-grid.
Boom! Done.
Wait is there an advanced version? Yes I will be releasing Activity Summary Pro in next 2 months :).
There are scenarios where we need to configure approvals in Dynamics 365, for example, mark an account as a premium customer after approval or qualify leads after approval etc. We used dialog control to capture approval request and comments but, now dialog controls are depreciated and not advised for use in new projects.
As per Microsoft’s initial announcement
Dialogs are deprecated and are replaced by mobile task flows (available as of the December 2016 update), and business process flows. Both task flows and business process flows will continue to evolve to make the transition easier.
But either tasks flow or business process flow was not a perfect replacement for Dialog. Knowing this pain from users, Microsoft has now modified the announcement.
Even though I knew canvas apps can be now embedded in model-driven apps, I hadn’t thought of this option until I came across this new announcement, so tried replicating my approval dialogs with a canvas app and it works fine. Pheww!!!! 🙂
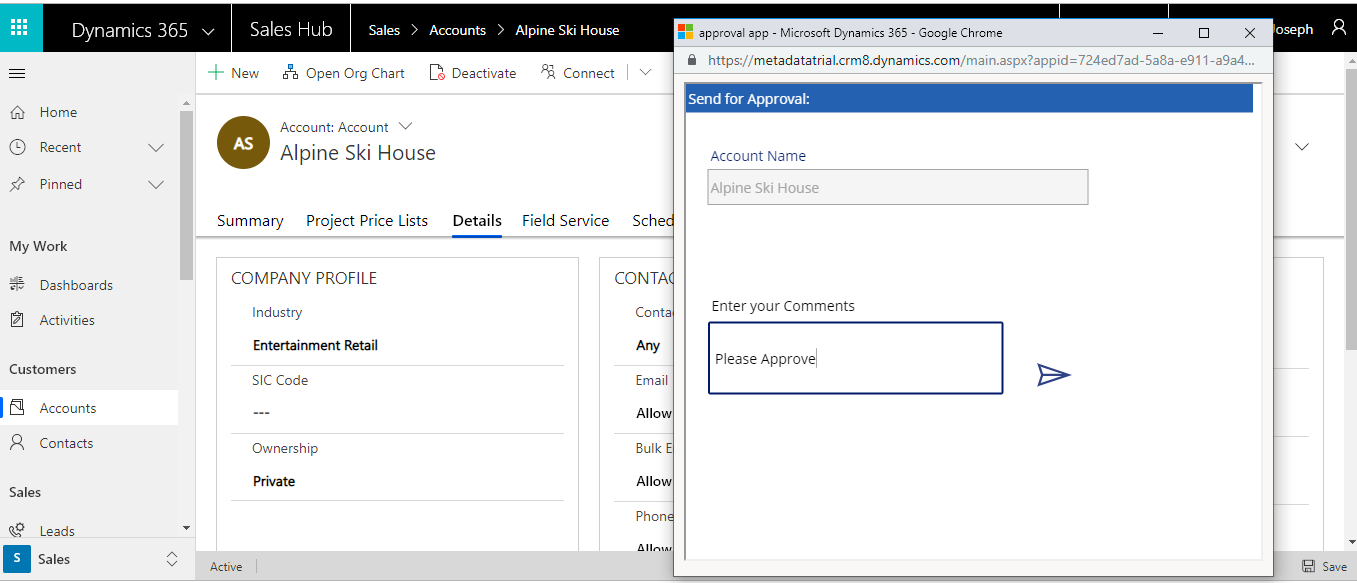
For testing purpose I replicated the dialog for creating approval request for Account entity.
created a canvas app to create approval request.
This sample app changes account status to pending verification and captures the comments in one custom field.
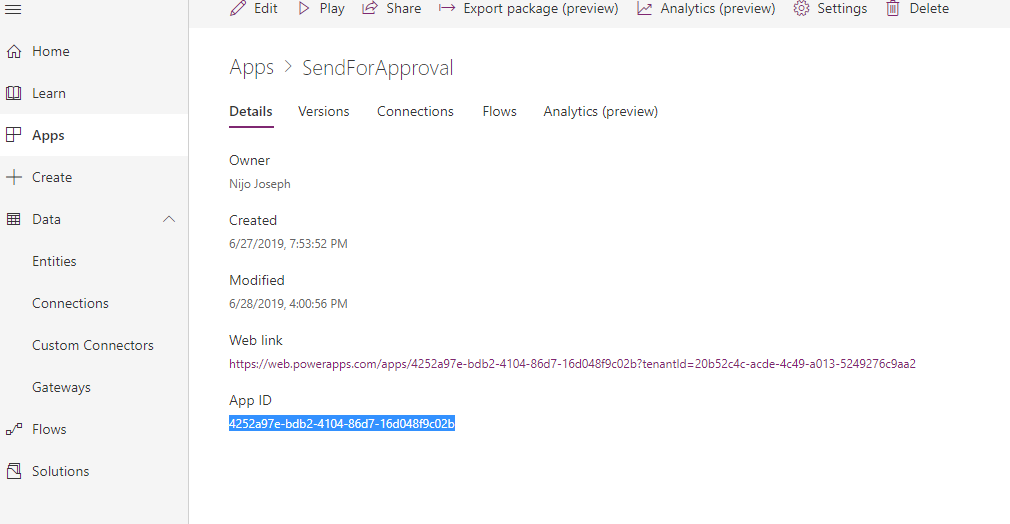
2. Now we need to call this app from account form, obtain the app ID from app details section.
select app details to get the App GUID
3. I need to call this canvas app as a popup when user clicks a button. I created a custom button for account entity-> added a JavaScript as button action to call an HTML web-resource and embedded my canvas app in this html I-frame.
I know you have many questions now. "https://web.powerapps.com/webplayer/iframeapp?source=iframe&appId=/providers/Microsoft.PowerApps/apps/56123673-f45c-4b96-b9e6-ece1b0a8069a&ID="+AccountID;
App GUID I explained in step 2, now regarding custom parameter, I deliberately didn’t mention it when we discussed the app creation and kept for this section. When we open this canvas from an account form(like we start a dialogue) the app needs the record GUID to update the account status
I have used form control in the canvas app and filtered the item using the ID Parameter.
Please note this is a basic app I tried for testing purpose and needs many improvements to use in a live project. you are always welcome to discuss with on this app.
Finally, the expected next version of Dynamics 365, V9.0 is available from today. I’ve been so excited about the V9.0 new features and finally got a chance to play with it today.
I have been playing around with the entities, grids, new controls, settings etc. This will be the first blog post of this ‘First Look’ series, I have added the things I found interesting in the new version so far, I will be writing more about the features of V9.0 in next posts.
Unified Interface:
Alright, let’s start with the Unified Interface (UI) introduced, the UI looks pretty clean and organized now with the borders for the containers, word wraps, etc.
As mentioned in the below image,
Unnecessary white spaces are reduced.
Word wrap, borders for the containers – it gives a clean look